Using Color Swatches in Magento 2 provides a visually appealing experience for your website visitors. It allows visitors to instantly see the corresponding image when choosing a colour before adding it to their shopping cart, improving the user experience.
Besides colour choice, customisable swatches also offer options for size, material and texture. In this article, we will look specifically at using the Color Swatch.
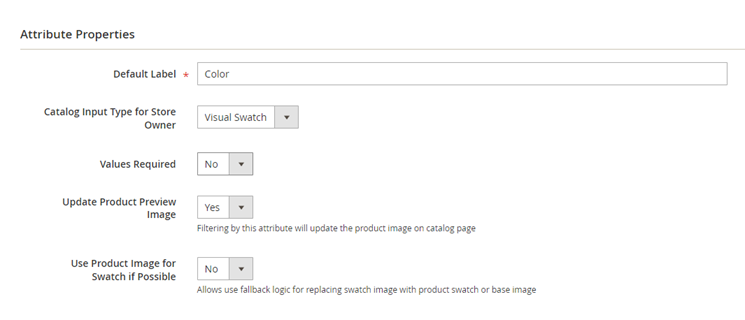
Step 1: Configure Color Attribute Settings
In Magento admin, go to Stores > Attributes > Product. Select the color attribute.
In the attribute configuration, set the following fields:
- Catalog Input Type for Store Owner: Visual Swatch.
- Values Required: No.
- Updated Product Preview Image: set this to
Yesif you want the product image to change based on the chosen colour. - Use Product Image for Swatch if Possible: No
Step 2: Add a new Color Swatch
Click on Add Swatch, choose a color from the colorpicker or upload a file.

Give the color a name, make sure you enter the exact name matching the attribute in Tweakwise. If you upload an image, make sure it is a square image.
Check that the new colour swatch is correct and save the attribute.
Step 3: Update products with the Colour Swatch
Go to Catalog > Products. Select the products you want to add the new colour swatch to and click on Edit Configuration/create Configuration.

Add adjustments to the product attributes. Select the attributes you want to activate and click Next.
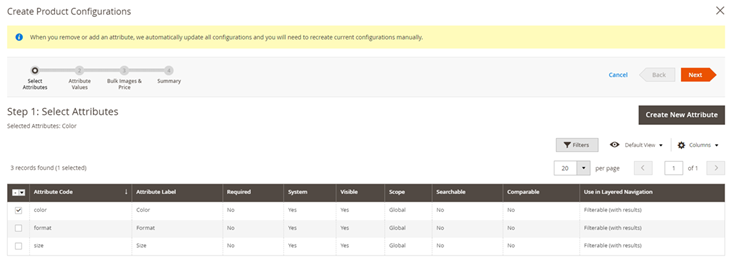
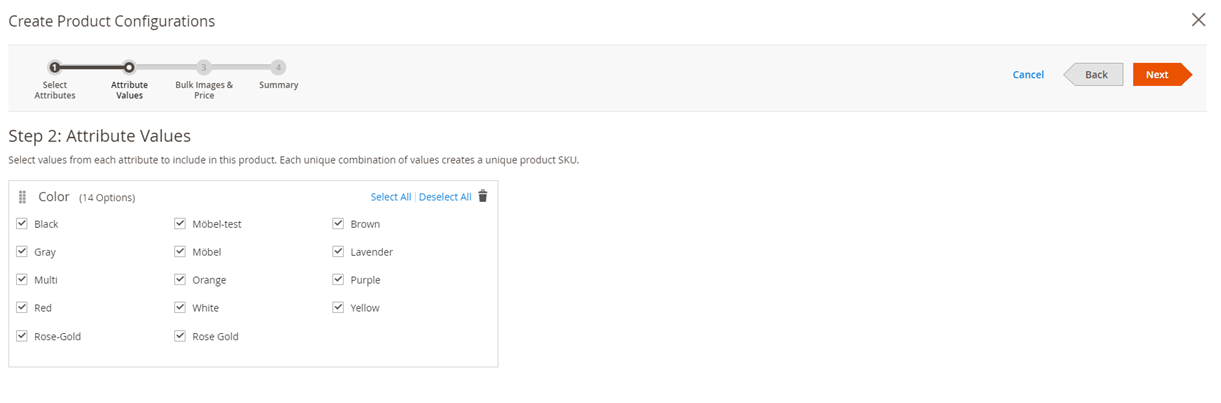
Choose the specific attributes for the product and click Next again. Each unique combination of attributes creates a unique product SKU.
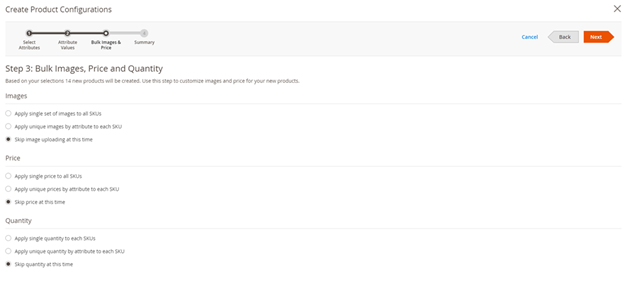
You can choose to link a selection of images to all SKUs.
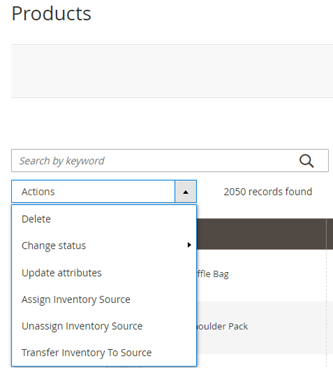
Step 4: Batch update of products
Go to Catalog > Products. Select the products to which you want to attach swatches. In the ‘actions control’ dropdown, select Update Attributes.
Scroll to color, choose change, and select the colour swatch you want to apply. Save the changes.
Note: remember to empty the cache via the Cache Management to see your changes reflected immediately.