Getting started for Shopware integration.
Learn how to install or update the Shopware Tweakwise extension using Composer or the Shopware Admin interface with step-by-step instructions.
1. Installation
The preferred method for installing this extension is using the Shopware Admin. New releases are automatically available in the Shopware store.
Using the Shopware Admin
To install or update the extension using the Shopware admin interface, navigate to Extensions > My Extensions in your admin environment.
Find the Tweakwise Extension and click the install or update button.
Using Composer
To install or update the extension using Composer, run this command to ensure you have the latest compatible version of the Tweakwise extension in your composer.json file:
Install and Activate
After adding the extension via Composer, you need to install and activate it in your Shopware environment. This command will install the extension and immediately activate it so it's ready to use:
Update
If you already have the extension installed and want to update it to the latest version, use this command. This is typically done after updating the extension package via Composer:
2. Configuration
The Shopware Tweakwise connection is configured through a "Frontend" entity.
- Login to the backend as an administrator.
- Go to Settings > Extensions and click on Tweakwise frontend.
- In the top right corner, click "Create new frontend" to start a new configuration.
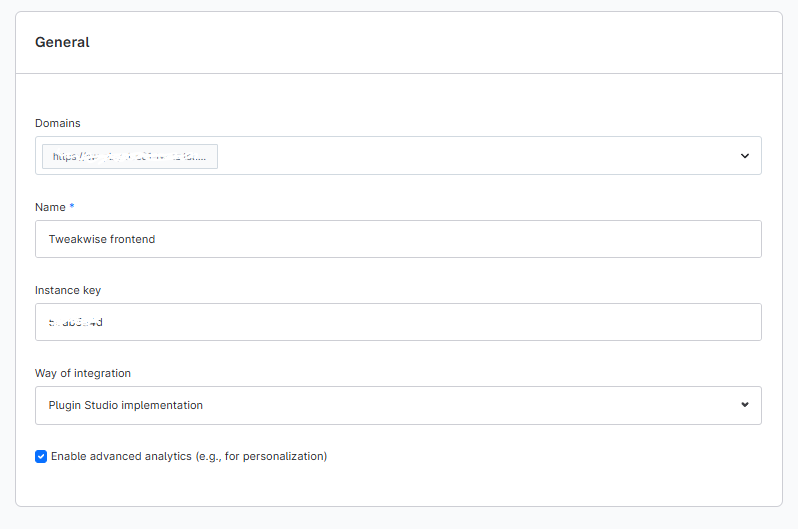
Section: General
Configure:
- Domains: select the domains you want to include.
The domains you can select are the domains that are connected to a sales channel. The integration will only be activated on the selected domains. - Name: give the frontend configuration a name.
Note: this is for internal use to identify the configuration and will never be visible on the frontend of your platform. - Instance key: you can find this key in the Tweakwise app dashboard.
- Way of integration: choose Plugin Studio implementation.
- Enable advanced analytics: checked. The out of the box Event Tag implementation that allows you to get more insights in the performance of your Tweakwise configuration.
Note: if your admin is in Dutch, look for Manier van integreren and set it to Plugin Studio implementatie.