
Commerce Pages helps e-commerce teams turn category pages into scalable conversion drivers. Using the Merchandising Builder, smart sorting and adaptive filters, teams control how products are discovered and presented. As merchandising maturity grows, layouts and experiences can be enriched to further improve relevance and conversion.
This guide explains how to configure the Tweakwise extension in Shopware to enable Commerce Pages on your category pages.
Configuration
Go to Content → Shopping Experiences and select your listing page template.
-
Find the "Category Listing' element.
-
Click the ⚙️ clog icon in the right upper corner:
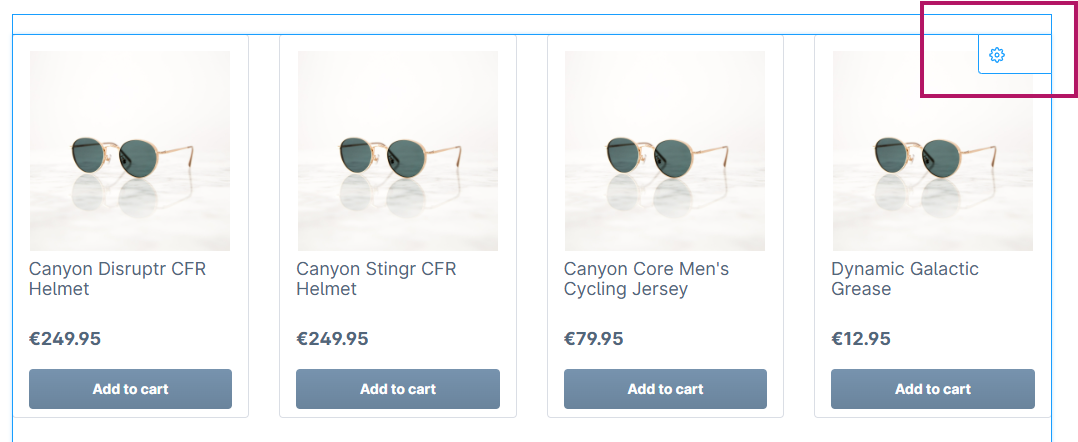
-
In the Content tab, set Layout type to Tweakwise Merchandising:
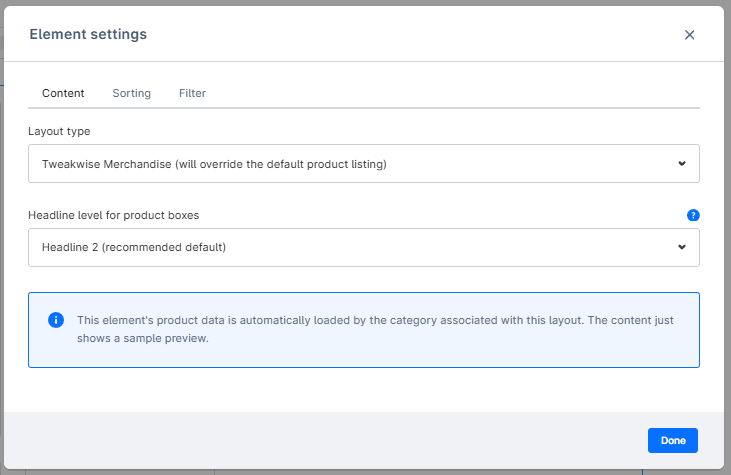
- Save.
The categories are now powered by Tweakwise!
Notes & recommendations
- Fresh Installation: if you're using the default Shopware layout, you'll have to duplicate that default layout before you can edit. Important: don't forget to assign it to your categories!
- Feed Sync Dependency: Commerce Pages rely on the category IDs in your Shopware feed matching the IDs in the Tweakwise App. If you've recently added categories, ensure a Full Import has run before expecting results on the frontend.
Attribute Landing Pages
For marketing campaigns, it is great to introduce URLs behind which a search-engine optimised product overview page becomes visible. Think of special pages for brands or a specific group of products such as Blue Adidas Sneakers.
Attribute Landing Pages vs. Dynamic CategoriesLanding pages do not require a sync; instead, they use runtime filters to display the desired selection of products. This makes them a much better choice than dynamic categories, where the selection is determined during feed generation. Consequently, Attribute Landing Pages are actually far more dynamic than Shopware's Dynamic Categories.
Read more about configuring Landing Pages here