Want to highlight special items, for example for Black Friday with a label on your product tile? With your Tweakwise JS plugin and tile setup, it’s easier than ever. This guide walks you step-by-step through adding that extra spark to your tile.
What we’ll cover:
- Updating your product feed or API with a new attribute
- Getting that attribute recognised by the system
- Configuring the tile in Plugin Studio and styling your label
Let’s dive in.
Add the label data to your platform or feed
Start in your e-commerce system (e.g., your product database or feed):
- Pick the products you want to label (for example: “Black Friday” deals).
- Create a new attribute, e.g.
label-blackfriday, and assign the value you want to show (for example:BF25). - If you’re using a product feed: make sure the new attribute is included in the feed and that the feed is updated.
- If you’re using the API: push an update for all relevant items including this new attribute.
Make sure Tweakwise picks it up
Once the data is ready:
- If you used a feed, trigger an import so the system ingests your updated attribute.
- In the attributes module of the Tweakwise backend, search and confirm
label-blackfridayappears. - Extend the API response with the attribute so that it is included in the API response.
- Publish your instance so the changes go live and can be used by Plugin Studio.
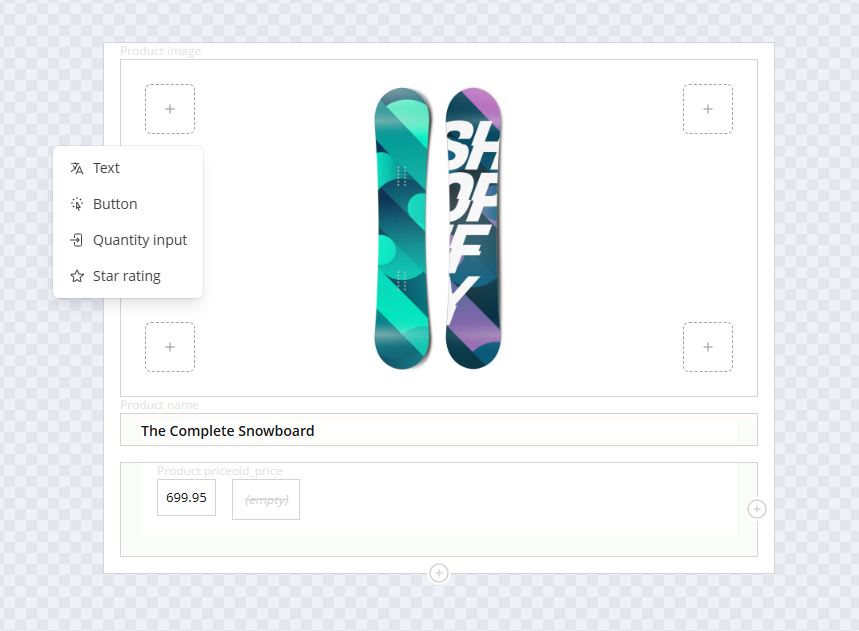
Configure the tile in Plugin Studio
Now for the fun part, making that label appear on the tile:
- Go to Plugin Studio.
- Open the tile you want to customise.
- Decide where you want the label to appear (e.g., top corner of the product image).
- Add a Text element at that location, select the element.
-
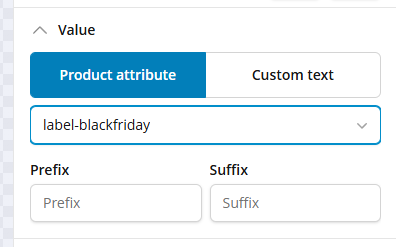
- In the right-sidebar (Value section), select the attribute you added (label-blackfriday):
-
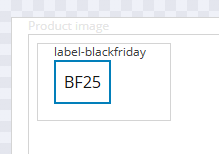
- Pick an example product that should show the label, you’ll see the value appear in the live preview:
- Use the styling tabs (Text, Element, Border, Spacing) to tweak font, colour, padding, background, etc. until the label looks exactly how you want.
- Use the Live preview to test and fine-tune positioning etc.
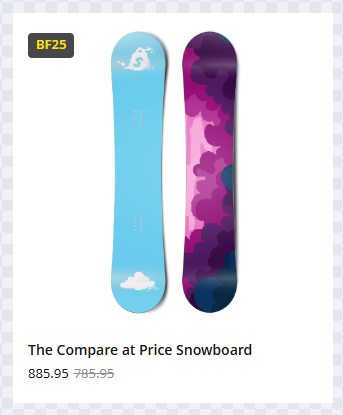
And that’s all there is to it! With a few simple steps you’ll have a label on your product tiles that stands out and makes your promotion shine.